Constructing a Robust Wooden Fence for Enhanced Home and Garden Security
The construction of a sturdy wooden fence offers a multifaceted approach to bolstering home and garden security. Beyond its primary function of defining property boundaries, a well-built fence acts as a significant deterrent to intruders, safeguards cherished plants and landscaping, and enhances the overall aesthetic appeal of the property. This comprehensive guide details the meticulous steps involved in building a secure and long-lasting wooden fence, emphasizing both practical construction techniques and the crucial considerations for material selection and design.
Phase 1: Planning and Preparation
A. Site Survey and Design
Before commencing construction, a thorough site survey is paramount. This involves meticulously mapping the perimeter where the fence will be erected. Consider existing landscaping features, underground utilities (e.g., gas lines, electrical cables), and any potential obstructions. Accurately measuring the total fence length ensures precise material estimations, minimizing waste and maximizing efficiency. The chosen fence design should complement the architectural style of the house and the surrounding landscape. Factors such as height, style (e.g., picket, board-on-board, post and rail), and gate placement should be carefully planned and documented. Local building codes and regulations regarding fence height and material specifications must also be reviewed and adhered to.
B. Material Selection and Acquisition
The longevity and security of the fence hinges significantly on the quality of materials used. Pressure-treated lumber is strongly recommended for its resistance to rot, decay, and insect infestation. The grade of lumber should be carefully selected to ensure structural integrity. For posts, choose pressure-treated lumber with a minimum diameter of 4 inches for enhanced stability and load-bearing capacity. Rails should be dimensioned lumber, typically 2x4s or 2x6s, depending on the fence height and design. The fence boards, also known as pickets or panels, should be of consistent thickness and free from significant knots or imperfections. Hardware, including galvanized or stainless steel nails, screws, post-hole digger, concrete mix, and gate hardware, should be procured in sufficient quantities to avoid project interruptions.
C. Permitting and Excavation
Depending on local regulations, obtaining necessary permits for fence construction might be required. It's crucial to contact the relevant authorities to ascertain the specific permitting process and requirements. Once permits are secured, excavation can commence. Use a post-hole digger to create precisely spaced holes for the fence posts. The depth of each hole should be determined by local frost line depth; this ensures the posts are firmly anchored and less susceptible to frost heave, which can compromise the fence's stability. Proper hole spacing is critical for alignment and structural integrity. Accurate measurements and consistent spacing between holes are essential for a straight and aesthetically pleasing fence.
Phase 2: Post Installation and Frame Construction
A. Setting Fence Posts
Setting the fence posts correctly is a crucial step that dictates the overall stability and longevity of the fence. Each post hole should be filled with a mixture of gravel and concrete to create a solid foundation. The gravel provides excellent drainage, preventing water accumulation around the post base. The concrete ensures a firm grip, preventing the post from settling or shifting over time. The posts should be plumb (perfectly vertical) and properly aligned to ensure a straight fence line. Using a level and plumb bob throughout this process guarantees a professional finish.
B. Attaching Rails
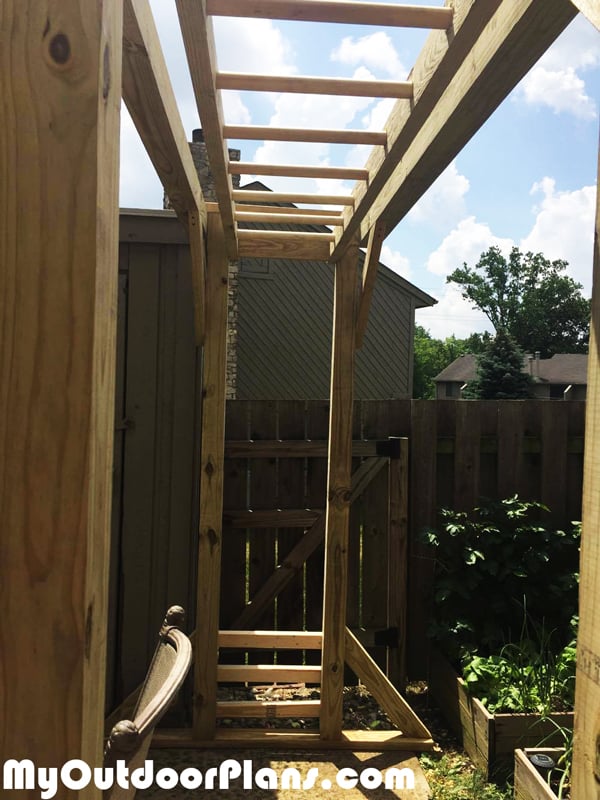
Once the posts have adequately set, the next stage involves attaching the rails, which act as horizontal supports for the fence boards. These rails are typically affixed to the posts using galvanized screws or nails, ensuring a strong and secure connection. The rails should be positioned evenly spaced along the length of the fence. Accurate spacing is critical for consistent board placement and an aesthetically pleasing fence. Proper alignment of the rails with the posts and other rails is essential to ensure the fence's overall structural strength.
C. Installing Gate Posts
If a gate is part of the fence design, the gate posts require special consideration. These posts should be slightly larger in diameter than the regular fence posts and set deeper into the ground for extra stability. The gate posts will bear the weight of the gate and should be robust enough to withstand significant force. Careful planning and accurate positioning are essential to ensure the gate operates smoothly and securely.
Phase 3: Fence Board Installation and Finishing
A. Attaching Fence Boards
With the frame complete, the fence boards can be installed. The boards are attached to the rails using galvanized nails or screws, ensuring they are aligned and evenly spaced. Consistent spacing between boards enhances the visual appeal of the fence and prevents sagging. The boards should be secured firmly to the rails to prevent movement or warping. The orientation of the boards (vertical or horizontal) depends on the chosen design. This stage requires patience and precision to achieve a uniform and visually pleasing finish.
B. Gate Installation and Adjustment
Installing the gate requires careful attention to detail. The gate should be hung smoothly and securely on its hinges, ensuring it opens and closes without obstruction. Proper gate adjustment is crucial to prevent sagging and to ensure a tight closure. The gate should be checked for proper alignment and secured with appropriate hardware. Installing a latch or lock provides added security.
C. Final Touches and Maintenance
Once the fence is complete, consider adding final touches such as painting or staining the wood for protection from the elements and enhanced aesthetic appeal. Applying a high-quality sealant will significantly extend the life of the fence by preventing moisture penetration and reducing damage from UV exposure. Regular maintenance, including annual inspections, cleaning, and repainting as needed, ensures the continued security and longevity of the fence. This includes checking for loose boards, damaged posts, and any signs of insect infestation or rot.
Conclusion
Building a sturdy wooden fence is a rewarding project that enhances both the security and aesthetic appeal of any home or garden. By carefully following these steps and prioritizing quality materials and workmanship, homeowners can create a long-lasting, secure, and visually pleasing fence that stands as a testament to their dedication and craftsmanship. Remember to always prioritize safety and adhere to local building codes and regulations throughout the entire construction process. The result will be a valuable investment that protects property and enhances the overall living environment for years to come.


